Starting a blog is incredibly rewarding.
Starting this blog–Daring to Live Fully–is one of the best decisions I’ve ever made. I use my blog for all of the following:
- As a creative outlet and as a way to express myself.
- As a medium for fleshing out my ideas.
- As a money-maker — as a recovering lawyer, I now make a full-time living from my blog.
- As a way to be recognized as a thought-leader in the areas of personal development, productivity, and self-learning.
- As a way to sharpen my business skills–marketing, product development, strategic planning, networking, and so on.
- As a way to serve others and inspire them to live their best lives.
- As a way to create a legacy.
In addition, in the future I might choose to write a book and have it published through traditional means. In that case, my blog would be a platform that I can use to promote and market my book.
Here are some other ways people use their blogs:
- To create a portfolio of their work which they can show to prospective employers or clients.
- As a hobby.
- As a way to document a journey — a weight loss journey, a home renovation project, a journey to financial independence, and so on.
To tell you the truth, I knew absolutely nothing about blogging when I first got started. In addition, I don’t have a background in technology — when I published my first blog post I was a total newbie when it came to anything technology-related.
However, one of my life mottos is, “I can figure anything out if I set my mind to it”. So, I took the plunge and started to blog.
Soon, I discovered that blogging is a lot easier than it looks, and that –with some effort–I could in fact figure out everything that I needed to know to become a successful blogger. Also, technology gets more user-friendly every day, so it’s a lot easier to get started blogging today than it was when I got started.
In this post I’m going to show you how to start a blog in eight simple steps.
How to Start a Blog – Eight Steps
Basically, all you need to do to start a blog is to follow these 8 steps:
- Step 1 – Believe that You Can Become a Blogger
- Step 2 – Choose a Topic/Niche
- Step 3 – Choose A Name and A Domain For Your Blog
- Step 4 – Choose a Blogging Platform
- Step 5 – Choose a Hosting Provider
- Step 6 – Design Your Blog and Start Blogging
- Step 7 – Choose a Theme
- Step 8 – Publish Your First Blog Post
I’m going to take you through these steps, one-by-one.
Step 1 – Believe You Can Become a Blogger
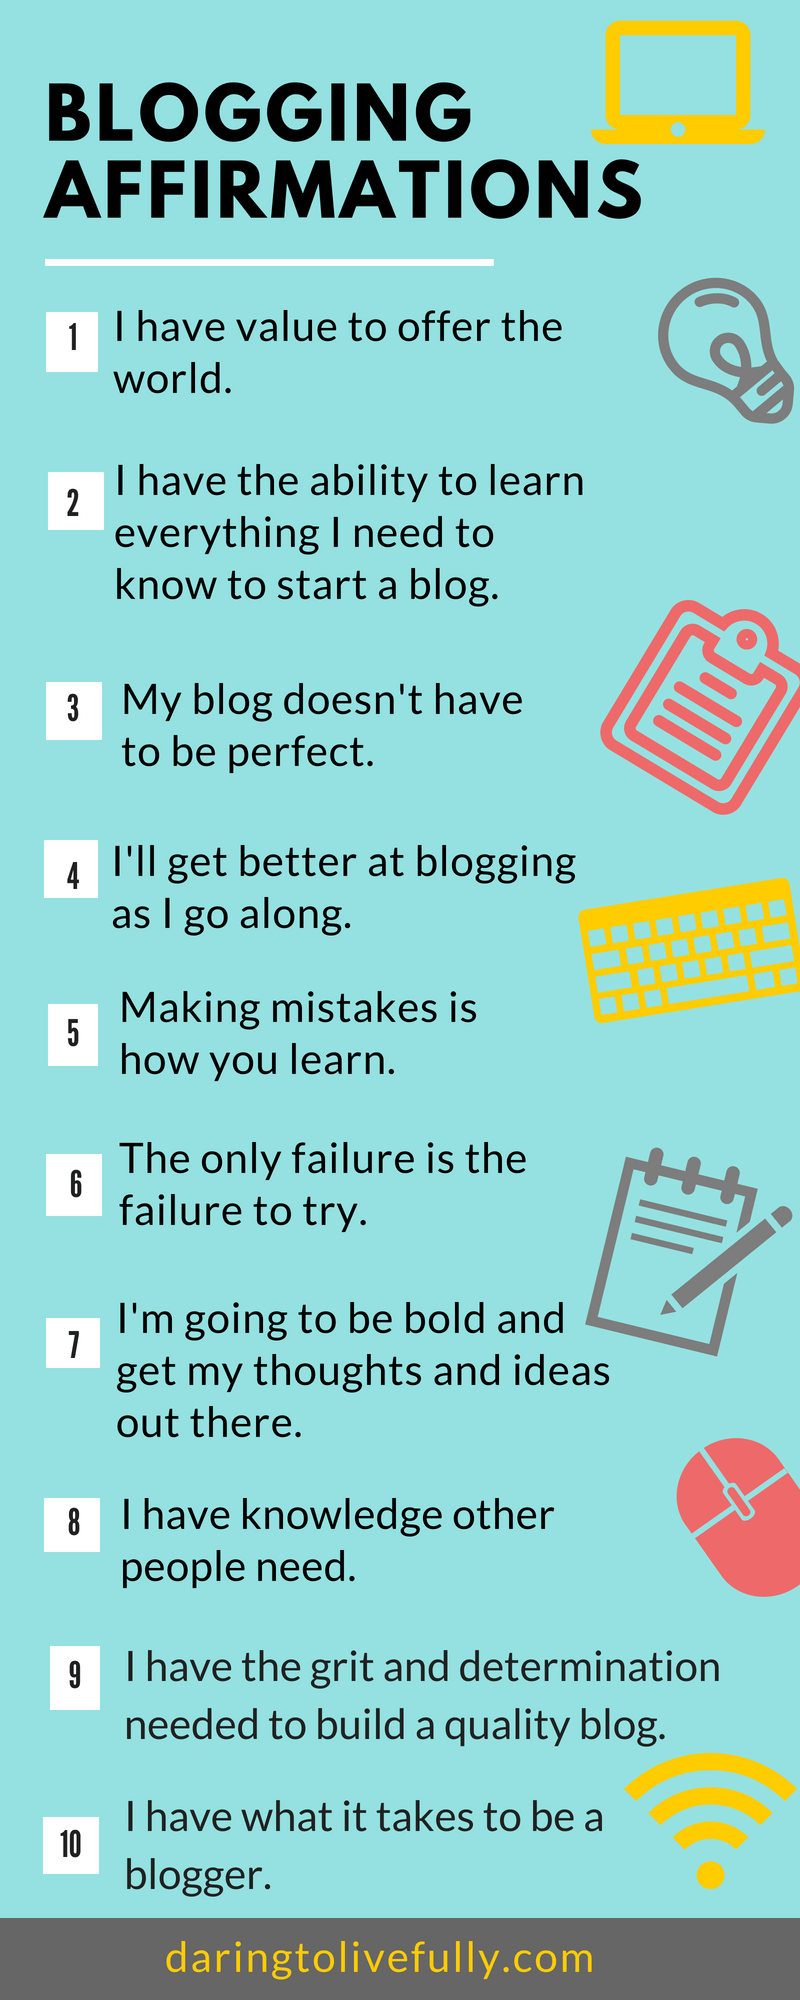
Whatever it is that you want to do–whether it’s to make more money, learn a new language, or start a blog–the first step is to believe that you can do it. Here are some of the beliefs you should adopt in order to gain the necessary confidence to start a blog you can be proud of:
- I have value to offer to the world.
- I have the ability to learn everything I need to know to start a blog.
- My blog doesn’t have to be perfect.
- I’ll get better at blogging as I go along.
- Making mistakes is how you learn.
- The only failure is the failure to try.
- I’m going to be bold and get my thoughts and ideas out there.
- I have knowledge other people need.
- I have the grit and determination needed to build a quality blog.
- I have what it takes to be a blogger.
With your new found belief that you have what it takes to become a great blogger, you’re ready to move on to Step 2 and decide what you’re going to blog about.
Step 2 – Choose a Topic/Niche
The first decision that you have to make in order to start a blog is to determine what you’ll be blogging about. When you choose your blog’s niche, or topic, you need to take three basic things into consideration:
- First. Choose something that you’re interested in writing about. You have to enjoy writing about the topic that you select, or you’ll get bored after a few months of blogging and quit.
- Second. There has to be an audience for your topic — that is, choose something that other people will be interested in reading about.
- Third. If you want to make money from your blog, choose a topic where you can promote products, or create your own, that others will want to buy.
You can really start a blog about anything:
- Review books that you’re reading — Bill Gates has a blog in which he writes about the books he’s reading.
- Give yourself a challenge and blog about it — one man gave himself the challenge of having 52 new experiences in 52 weeks, and he blogged about it.
- Become a mommy (or daddy) blogger and offer parenting tips.
- Write about recipes and cooking tips.
- Write about getting over a divorce, raising a special needs child, or going back to college after 40.
- Travel around the world and blog about it.
- Write about beauty and fashion.
Here are some questions you can ask yourself to help you decide on a blog topic:
- What do I love reading about?
- What do I love to do?
- How do I spend my free time?
- What am I good at?
- What problems do I know how to solve?
- What kinds of blogs do I visit on a regular basis? What do my favorite bloggers write about?
- What do my family members and friends ask me for advice on?
- What would I like to know more about?
- Who do I want to write for? What do they want to know?
Keep in mind that you don’t have to be an expert on a topic in order to write about it. You just need to be willing to do the necessary research to find out enough about the topic so that you can start writing about it with some authority.
Another tip is not to make your blog’s topic too broad or too narrow. Take a look at the following:
- You may have lots of interests, but if you write about fishing one day, you post about your favorite book the next week, and then you write about the steps that you’re taking to train your dog to do tricks the week after that, you’ll just confuse your readers.
- At the same time, if your topic is too narrow you’ll probably have a very small audience and it’s likely that you’ll run out of things to say after publishing a few blog posts.
Make your blog’s topic broad enough that you’ll have lots of people searching for the information you’ll be offering and so that you’ll have lots to say, but also narrow enough that people will know what to expect when they land on your blog.
Here’s a scene from the movie “Julie and Julia” in which the protagonist decides to start a blog and wonders what she should blog about:
Here’s what I recommend you do:
- Give yourself ten or fifteen minutes to brainstorm possible blog topics.
- Whittle that list down to your favorite ten or so.
- Rank the topics left on your list by using criteria such as the following: how passionate you are about the topic; how knowledgeable you are about the topic; and how likely it is that you’ll be able to make money by writing about that topic.
- Once you’ve ranked your topic, the one with the highest score wins. You have a blog topic!
Step 3 – Choose A Name and A Domain For Your Blog
The next step on your blogging journey is to come up with a good name for you blog. A good name has all of the following elements:
- It let’s people know what your blog is about –it’s descriptive.
- It’s catchy and memorable.
- It’s easy to pronounce and spell.
- It’s not too long.
- It helps you to build your brand.
- It’s in line with the tone/mood that you want for your blog (serious, funny, sassy, inspiring, and so on).
As you can see from my header, my blog’s name is “Daring to Live Fully”. I’m very happy with the name, and I think it helps anyone who lands on my blog to know right away that they’re going to find advice, tips, strategies, and information on how to live their best lives here.
Once you’ve chosen a name for your blog, you can select a domain name. Your domain name is just your blog’s URL. As an illustration, the domain name for my blog is daringtolivefully.com. In most cases, you should favor the domain extension “.com”.
If you’re having trouble naming your blog, one option is to use your full name. Then your domain would just be your name as well. Here are two examples:
- If your name is “Edith Taylor”, then that would be your blog’s name and your domain would be edithtaylor.com.
- If your name is “Matt Smith”, then that would be your blog’s name and your domain would be mattsmith.com.
Later on you can add a tagline that describes what your blog is about (my current tagline for Daring to Live Fully is “Live the Length and Width of Your Life”). Here are three examples of how you can use a tagline to let visitors know what your blog is about:
- If your blog is about home decor, your tagline could be “Simple, Elegant Decor”.
- If you’re going to write about business your tagline could be “Business Advice You Can Trust”.
- If you’re going to share the parenting tips that you’ve picked up as you raise your kids, your tagline could be “Raising Happy, Confident Kids”.
Again, you can come up with your tagline after you have a few blog posts under your belt and you have a better feel for the direction your blog is going to be taking.
When you’ve chosen your domain name, you have to register it. This typically costs about $10 – $12. However, the hosting provider that I’m going to recommend in Step 5 is Bluehost, and you can register your domain name with them for free as you set up your hosting account, so I’ll be covering domain registration in Step 5.
Step 4 – Choose a Blogging Platform
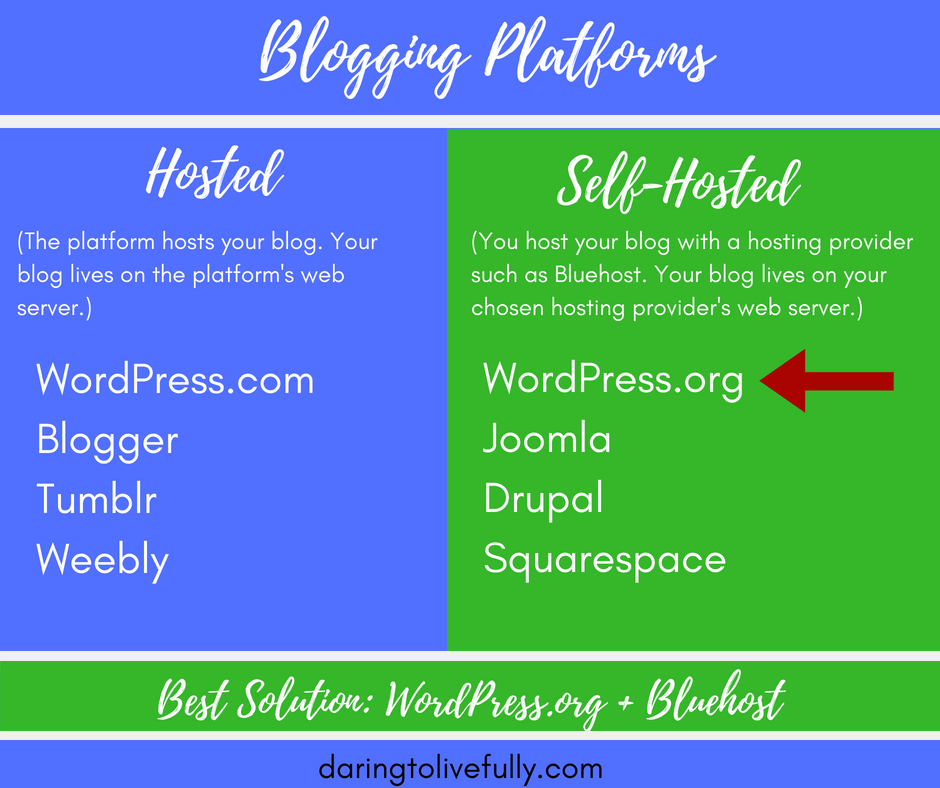
There are many blogging platforms out there, and they’re basically divided into two categories: hosted (or free) and self-hosted.
Hosted Blogging Platforms
A hosted blog is one for which you don’t have to pay for hosting. In other words, they’re free. Some of the hosted blogging platforms out there include the following:
- WordPress.com.
- Blogger.
- Tumblr.
- Weebly.
The good thing about a hosted platform is obvious: it’s free. The bad thing is that the site isn’t really yours, and you have a lot less freedom to do what you want with it than you would with a self-hosted site. If you use a hosted platform you’ll be giving up a lot of control, and you won’t look like a professional.
Self-Hosted Blogging Platforms
As you can probably guess, I strongly recommend that you choose a self-hosted platform. Self-hosted means that you have to pay for hosting yourself. The most popular self-hosted platforms are the following:
- WordPress.org (yes, another WordPress platform, but this one is .org and is self-hosted).
- Joomla.
- Drupal.
- Squarespace.
If you want to have complete control over your blog, then you need a self-hosted platform. With self-hosting your blog will be 100% your property, and you can build it from the ground up as you see fit.
WordPress.org is by far the most widely used self-hosted platform, and the one that I would most definitely recommend. It’s flexible and easy to use. In addition, there are tons of plugins available for WordPress.org which will improve your site’s functionality.
So, what do you pay for if you choose WordPress.org? You pay for a domain and for hosting.
However, with Bluehost–which is the hosting provider I recommend you choose in Step 5 below–you get a free domain, so you would just pay for hosting. At the same time, hosting with Bluehost costs less than $10 a month. This means that you can have a blog–which you own 100%–for a tiny price.
Yet another benefit of using Bluehost as your hosting provider is that they will automatically install WordPress.org for you when you purchase a hosting plan from them.
Step 5 – Choose a Hosting Provider
A hosting provider basically connects your site to the worldwide web so that it’s accessible to others. It’s vital to choose the right hosting provider. I cannot emphasize this enough.
Some of the things that you should consider when choosing a hosting provider are the following:
- The hosting provider’s reputation for reliability.
- The technical support that they offer.
- The features that they have available.
- Their prices.
- Their money-back guarantee.
Taking all of these things into consideration, I recommend Bluehost.com. Here’s why:
- You get a free domain–as you’re setting up your account with them you simply enter the domain that you want, and it’s registered.
- As I mentioned before, Bluehost will automatically install WordPress.org for you.
- They have 24/7 support, so there’s always someone available to help you and answer your questions. The Bluehost support staff is courteous and knowledgeable.
- They score a 99.9% uptime on average, which means your site is always available.
- They’re very affordable.
- They allow their users to host multiple domains and websites under one account.
- They have a 30-day money-back guarantee — during the first 30 days, they’ll refund your hosting fees in full.
- Set-up is really easy and intuitive – just follow the instructions and you can have your blog up and running in five minutes.
Are you ready? Get started on your blogging journey by following along with the step-by-step instructions below.
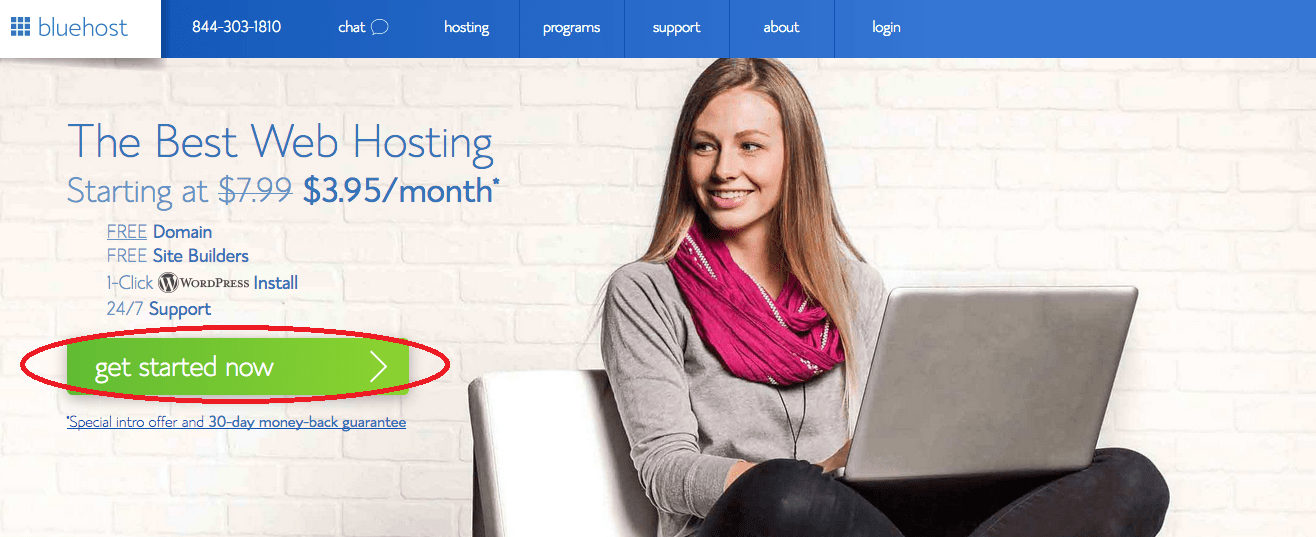
Get Started.
Go to the Bluehost.com site and click on the green “get started now” button.
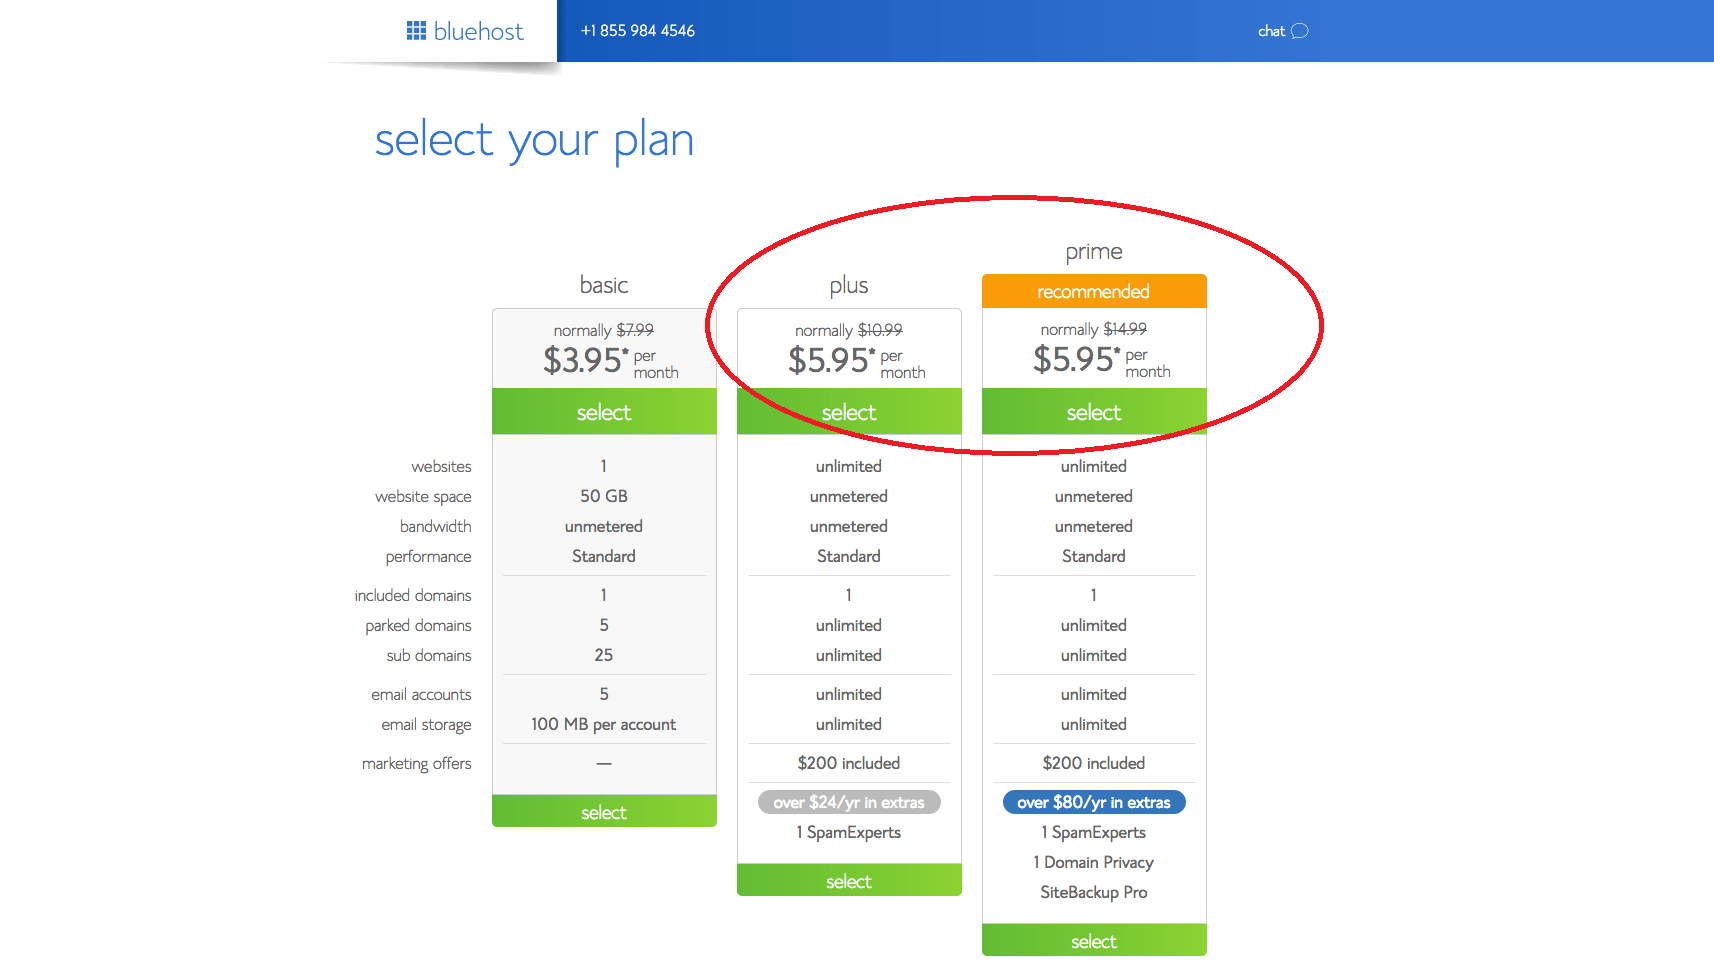
Select Your Plan.
Bluehost gives you three plans to choose from: Basic, Plus, and Prime. Whereas with the Basic Plan you can only host one website, with the Plus and Prime Plans you can host unlimited sites. One site v. unlimited sites? I think the choice is a no-brainer: choose either the Plus or the Prime plans.
Once you’ve chosen your plan, just click on the “Select” button for that plan.
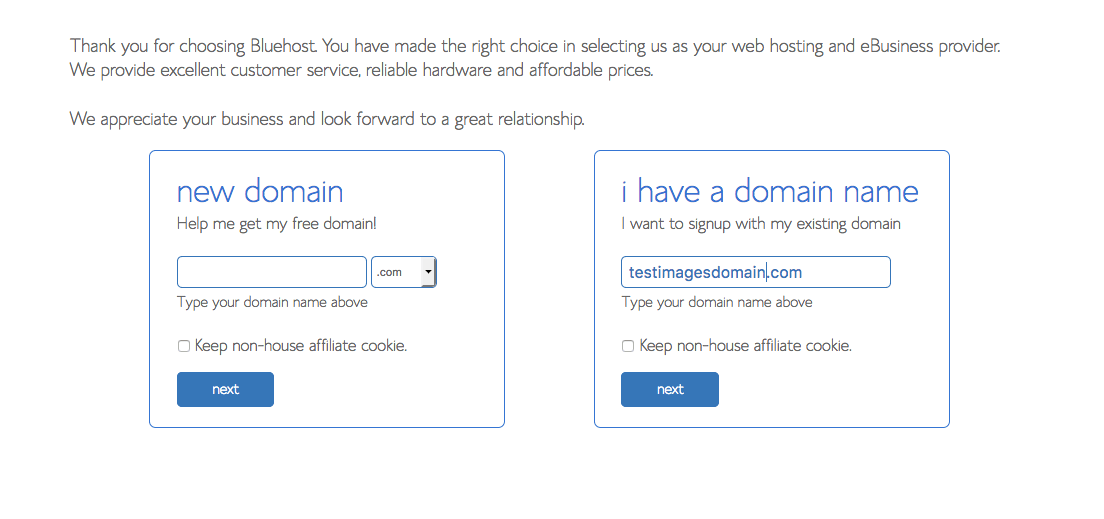
Insert Your Domain Name.
As I stated above, if you can’t decide on a domain name, just use your name. If you already have a domain name (you purchased one elsewhere) use the “I have a domain name” box.
If you don’t have a domain name–which is likely to be the case if you’re just getting startedwith blogging–insert the domain you’ve chosen in the “new domain” box. Again, with Bluehost, your domain is free.
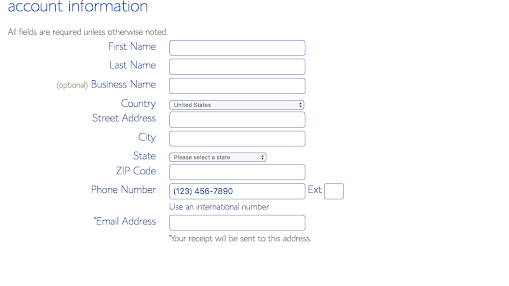
Enter Your Account Information.
Next you’ll be asked to enter your account information. Go ahead and do so.
Choose an account plan based on how far in advance you want to pay. You can choose to pay 1, 2, 3 or 5 years upfront. Bluehost doesn’t offer a monthly payment plan (that’s how they keep their prices so low). As you can see, it works out to be a very reasonable monthly amount.
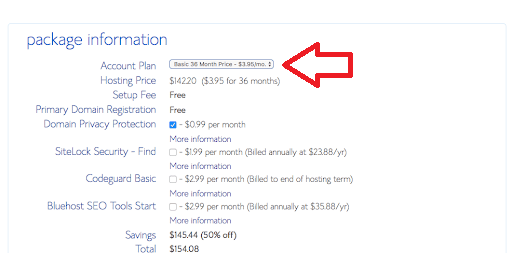
I skip the add-ons. However, if you don’t want people to be able to see the address that you’re using for your domain, then choose “Domain Privacy” (you get this for free with the Prime Plan). Once you’ve made your selections, you’ll get the total that you’ll pay.
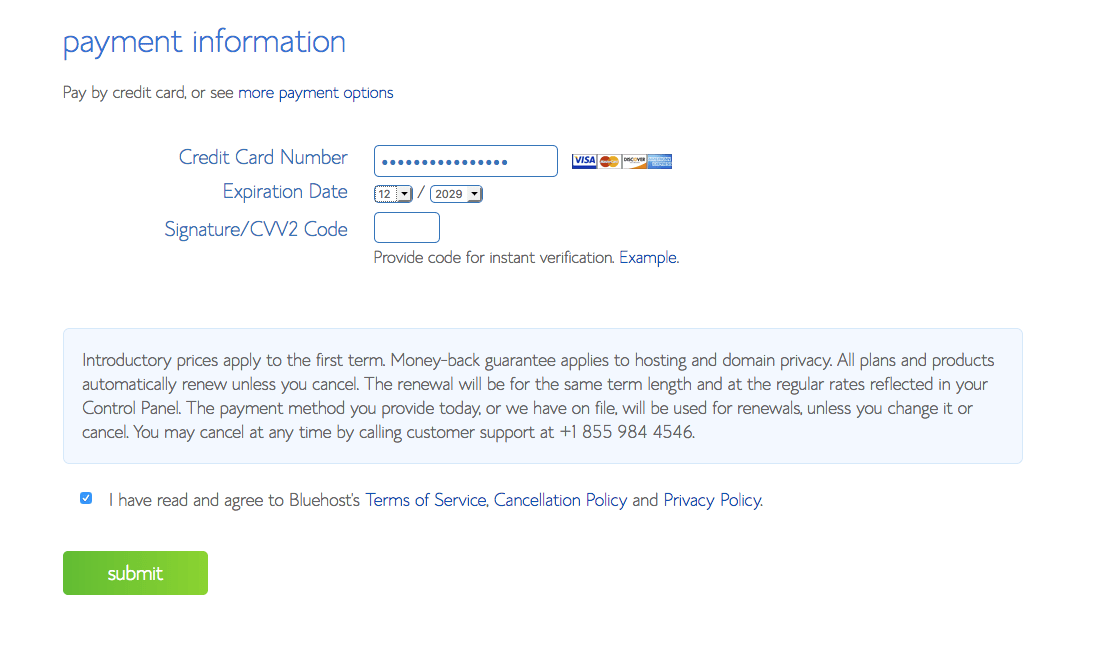
Enter Your Billing Information.
Fill in your billing information, confirm that you’ve read the fine print, and then click “Submit”.
Skip the Upgrades and Special Offers.
At this point you’ll be offered some upgrades and special offers. I suggest you click on the “no thanks” link.
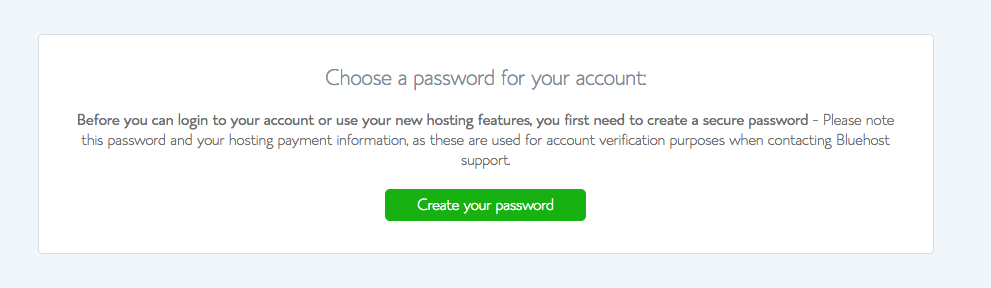
Choose a Password.
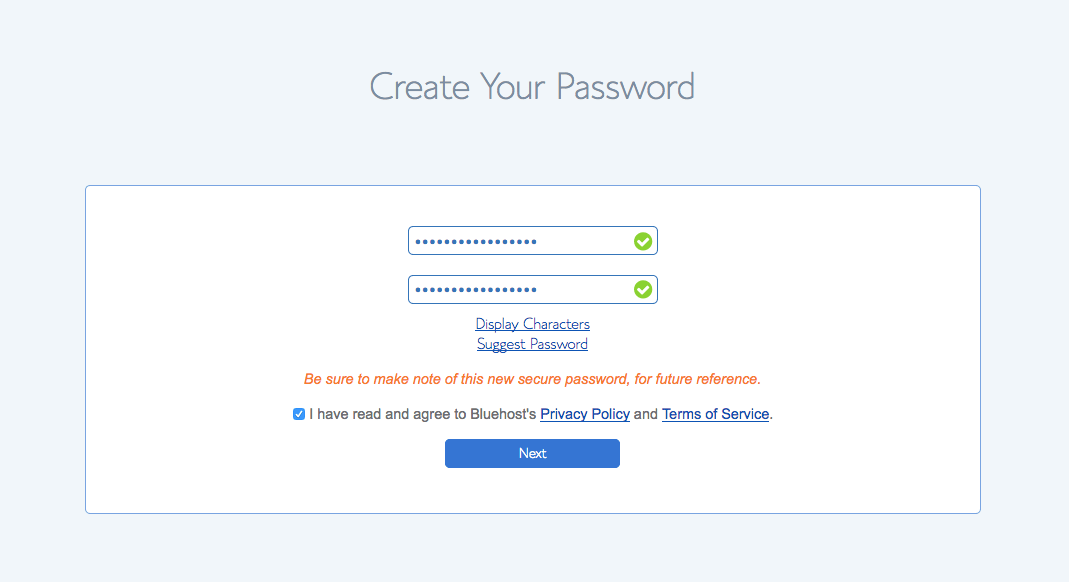
Now you’re ready to choose your password. Click on “Create Your Password”.
You’ll be taken to a screen where you create your password. When you’ve chosen a password, click on “Next”.
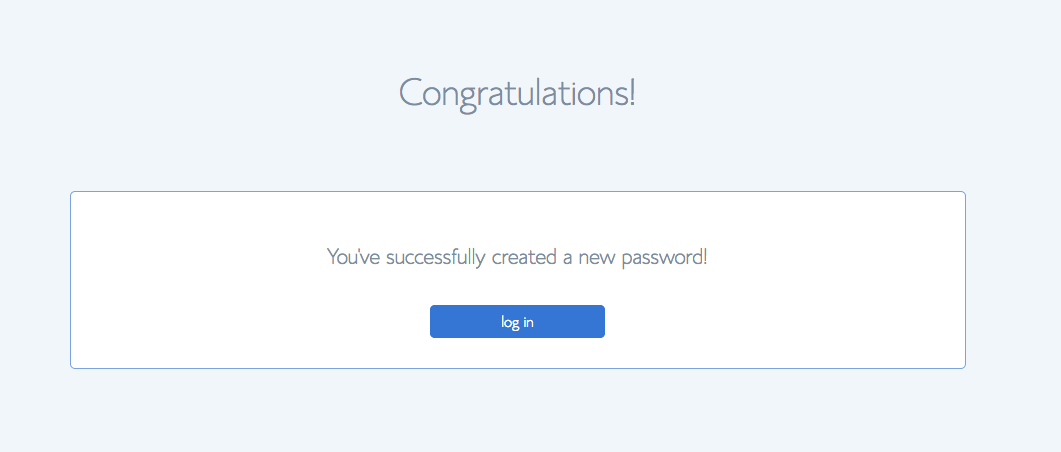
Get Started with WordPress.
Next you’ll see a congratulations screen like the one below. Click on “log in” (as I stated, above, Bluehost automatically installs WordPress for you).
Skip the Free Themes.
WordPress is open-source, which means that they allow anyone to create themes and plugins for WordPress. As a result–although there’s a lot of great free stuff out there to enhance your site–, there are a lot of free themes and plugins that are not trustworthy and could potentially harm your site.
For now, simply stay with the theme that comes with WordPress right out of the box (the WordPress default theme). We’ll talk more about themes in Step 7 of this tutorial.
Start Building.
Click on “Start Building”.
 You’ll be taken to your WordPress dashboard, like so:
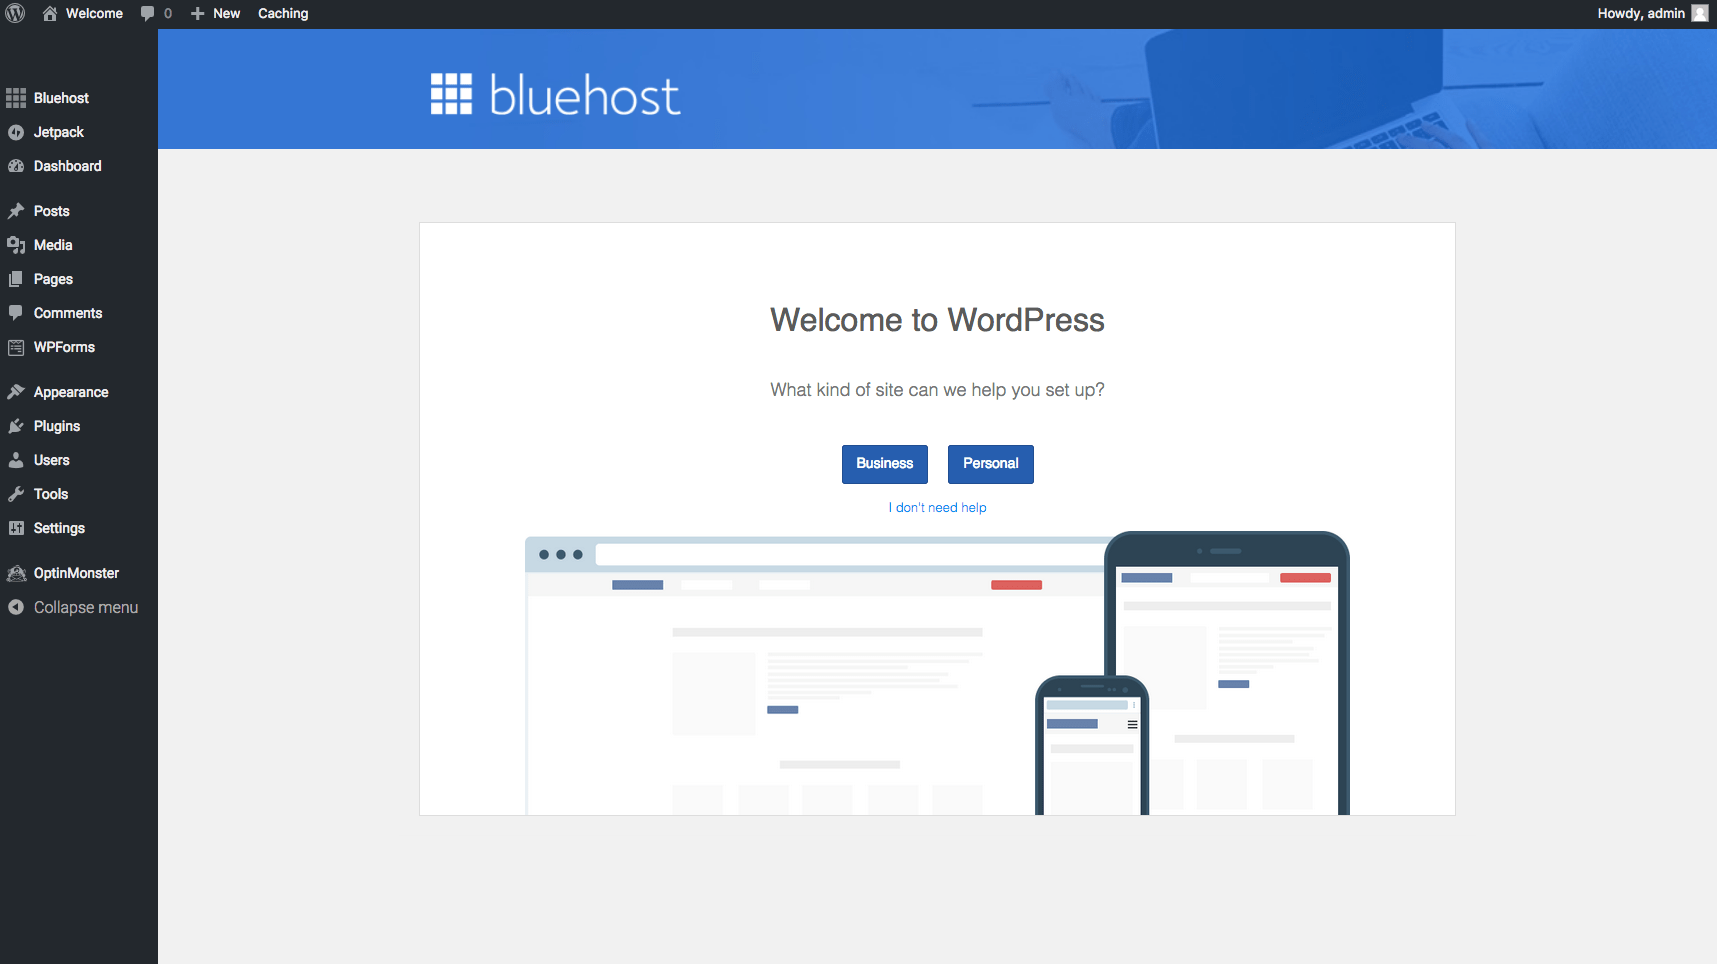
I recommend you ignore the blue buttons in the middle of the screen (Business & Personal) and choose the link that says “I don’t need help” instead. It’s better to start with a clean slate.
If you get stuck anywhere along this process, just contact Bluehost and they’ll be happy to help you.
Step 6 – Setting Things Up
You can access your WordPress dashboard at any time simply by going to “yourdomain.com/wp-admin”. Your dashboard is your command center; it’s where the magic happens.
To set things up, take the following steps:
- Go to Settings > General. Fill out your tagline if you have one (right now it should say “Just Another WordPress Site”), choose your time zone, and save your changes.
- Go to Users > Your Profile. Fill out your first and last names, choose a nickname (it can be your first name), and the name you want to display publicly. You can also add some biographical information if you want to. Save your changes.
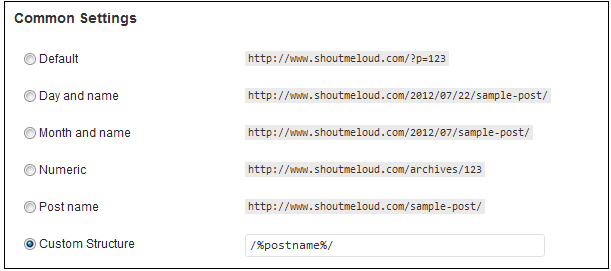
- Go to Settings > Permalinks. Check “custom structure” and write in the following: /%postname%/
Now you’re all set up.
7. Choose a Theme
A theme is your blog’s visual style. The theme you choose should complement your blog’s topic and help you to build your brand. If you decide to start with a free theme, as stated above, you can simply get started with the WordPress default theme (the one that comes installed with WordPress).
In addition, here are two good free themes for you to choose from:
- The free version of Astra.
- GeneratePress
Alternatively, you can purchase a premium theme. Premium themes have a higher quality and more functionality than the free themes. They’re also better for search engine optimization, which means that if you use a premium theme it’s more likely that your blog posts will rank well in the search engines.
I recommend the Thrive Themes. Here’s why:
- Their themes are conversion focused, which means that they’re designed to help you sell more.
- With a Thrive Themes membership you get much more than just themes. You also get plugins that will allow you to create landing pages and optin forms in minutes. This is incredibly helpful to build your email list and monetize your blog.
If you’d like, you can begin with a free theme and purchase Thrive Themes when you feel ready.
Step 8 – Publish Your First Blog Post
After you’ve chosen a theme for your blog, you’re ready to start blogging. Click on Posts > Add New. And there you go. Write your first post.
What should your first blog post be about? One idea is to talk a little about yourself, your interests and accomplishments, why you decided to start a blog, and what your blog will be about. However, what you decide to write about is completely up to you!
Always keep in mind that each time you write a blog post your goal should be to strive to create value for others. Ask yourself questions such as the following:
- Will this post help people solve a problem that they’re having?
- Will this post give people information that they need?
- Will this post inspire or motivate others?
- Will others find this post entertaining, filled with beauty, instructional, inspirational, or helpful in some other way?
Your blog posts can be as short or as long as you want them to be, but it’s a good idea to shoot for about 600 words. In addition, you want to post consistently. This doesn’t mean that you need to post daily, but you should post on a regular basis. A good rule of thumb is to post once a week, and to always post on the same day of the week.
Conclusion
To conclude, here’s a two-step summary of the instructions contained in this blog post:
- Open an account with Bluehost.com.
- Devote one-hour-a-day to blogging.
Starting a blog may be a little scary at first, but I’m sure you’re up to the challenge. Soon you’ll find yourself wondering why you didn’t get started sooner!
Disclosure: I am a Bluehost affiliate, which means that if you open an account with Bluehost through my link, I get a commission (with no extra cost to you).


Related Posts:
 Marelisa Fabrega is a lawyer and entrepreneur. She holds a Bachelor of Science in Business Administration from Georgetown University in Washington, D.C., as well as a Juris Doctor from the Georgetown University Law Center. You can learn more about her